Effortless Loose Curls for Summer: A Step-by-Step Guide
- June 13, 2025
- 0
That breezy, soft curl look you see all over social media? It’s not just reserved for photo shoots and influencers. With a little practice and the right tools,
That breezy, soft curl look you see all over social media? It’s not just reserved for photo shoots and influencers. With a little practice and the right tools,
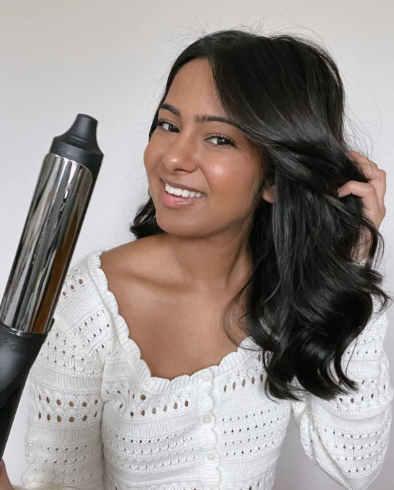
That breezy, soft curl look you see all over social media? It’s not just reserved for photo shoots and influencers. With a little practice and the right tools, you can master loose curls at home using just your flat iron. Whether you’re getting ready for a day in the sun or a night out, this style adds a touch of easy elegance to any look.
Here’s a straightforward method to achieve natural-looking waves that feel just right for summer.
Loose curls hold best on clean, conditioned hair. Wash your hair with your usual products, and if you have a leave-in conditioner, go ahead and apply it. Since heat tools can be drying, adding moisture early on helps protect your strands.
Before you touch your hair with any hot tools, apply a heat protectant. This creates a barrier that locks in moisture and prevents heat damage. Be sure to apply it evenly and avoid overdoing it—too much product can weigh down your hair or make it greasy.
Wet hair is especially delicate, so be mindful during the drying process. If you can, let your hair air dry for a while. Otherwise, towel dry gently and use a blow dryer on a low setting until your hair is fully dry and ready for styling.
To make curling easier and more consistent, part your hair into sections. Three large sections—bottom, middle, and top—are usually enough. Use clips to secure each section so you can work through them one at a time.
Adjust your flat iron to a temperature suitable for your hair type. Fine or fragile hair requires lower heat, while thicker strands can handle more. A hotter setting will create longer-lasting curls, but be cautious not to use more heat than necessary.
For the most consistent results, lightly straighten each section before curling. This smooths out any texture or frizz, making it easier to get uniform waves. Take one-inch pieces at a time, glide the iron down the strand, and let it cool before moving on.
Once the hair is straightened, it’s time to add curls. Place the flat iron near the root of a section, angled down, and twist it away from your face as you glide it toward the ends. Begin the curl around cheekbone level for a relaxed, beachy finish. Release the curl and allow it to cool in place.
As each curl is finished, gently twist it back and secure it with a pin. This helps the curl set and last longer, especially on warmer days when styles tend to fall flat faster.
Once all your curls are pinned, apply a light-hold hairspray. This will help the curls hold their shape without making them stiff. Avoid using strong-hold sprays, which can make your waves feel crunchy and unnatural.
After about 20 minutes, remove all pins and shake out your curls. Use your fingers or a wide-tooth comb to gently separate and soften the waves. The result should be relaxed, touchable curls that look effortlessly styled.
Loose curls are a go-to summer look for a reason—they’re flattering, versatile, and easy to create once you get the hang of the technique. With a bit of practice and the right prep, you’ll have a hairstyle that looks like it took hours, even if it only took minutes.