DIY Embroidered Pocket Plants: A Beginner’s Guide
- March 20, 2024
- 0
As we’re getting ready for a move in two weeks, I decided to put a temporary ban on buying any new plants. Normally, I’d be at the nursery
As we’re getting ready for a move in two weeks, I decided to put a temporary ban on buying any new plants. Normally, I’d be at the nursery

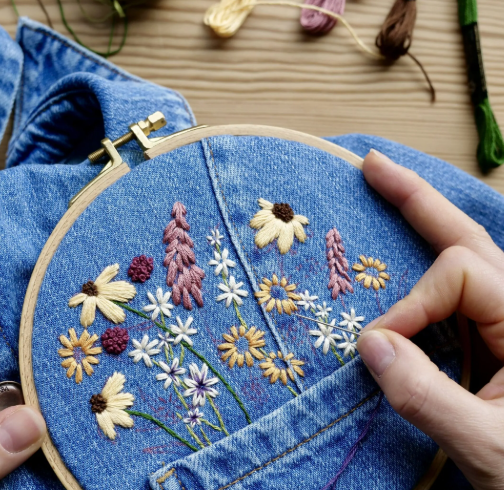
As we’re getting ready for a move in two weeks, I decided to put a temporary ban on buying any new plants. Normally, I’d be at the nursery every other week, grabbing whatever’s in season, but now I need to get my plant fix in different ways. This gave me the perfect opportunity to explore other plant-themed crafts, and I landed on something fun: embroidered pocket plants!
A New Crafting Adventure: Embroidery with DMC Magic Paper
A few months ago, I took a leap into the world of embroidery. When DMC reached out to see if I wanted to try one of their beginner-friendly kits from the 1000 Patterns Project, I was both nervous and excited. Growing up, my mom used DMC patterns to hand-stitch stockings for our family every year, so embroidery always felt like a skill level I could never quite reach.
While I’m still far from matching my mom’s craftsmanship, I’m really enjoying DMC’s Magic Paper for beginners. (This isn’t a sponsored post, by the way. I genuinely loved using the Magic Paper kit and thought it could be helpful for fellow embroidery newbies!)
What You’ll Need:
DMC offers blank Magic Paper sheets for creating your own designs, although I haven’t used them yet. The Magic Paper is water-soluble, which makes it easy to remove once the embroidery is done. It’s like magic—watching the paper dissolve in water was honestly the coolest part of the process!
How to Get Started:
I’m so pleased with how these turned out. I learned new stitches and completed a finished piece in just a few hours. Plus, my sister has already tried to steal it, so I’d say that’s a sign of success!
Have you tried embroidery before? What’s a DIY skill you’ve been meaning to tackle? Let me know in the comments!